Wordpress vs Webflow: a migration guide
The choice between WordPress and Webflow should be guided by your brand's identity and needs. Both platforms offer unique advantages and require different approaches. The journey to building your digital presence is a microcosm of your brand’s true self – understanding its core, its purpose, and how best to represent it in the digital world.
.svg)
The decision to build a website to represent your brand and offering starts with one very important decision: do I go with WordPress or Webflow? Seems simple, perhaps even more so with 43.5% of websites on the open internet being built on Wordpress, compared to Webflow’s 0.7%, but once we dive a bit deeper, you might see that it’s not so straightforward.
Why migrate to Webflow?
WordPress and Webflow are both a hosting provider of a content management system that ostensibly do the same thing, in that they make it easy to build a website, even with limited coding knowledge. On one side, you have the mighty WordPress, a veteran with a vast array of tools and plugins - familiar yet evolving. On the other, the sleek and modern Webflow, a newcomer with a promise of intuitive design freedom. Both have their strengths and nuances, but understanding your needs is essential to determine which path to tread for web hosting.
Dive deep into a wordpress website
Imagine WordPress as an ancient city. Its architecture is grand, its streets winding and well-trodden. With a rich history, it offers an extensive library of premium plugins and themes. It's versatile, catering to bloggers, e-commerce entrepreneurs, and corporate giants alike. The market for WordPress sites is vast and expansive, filled with hidden pitfalls. To steer through it successfully, goals need to be defined. Are you a blogger needing a straightforward platform? WordPress provides countless themes to get you started. Are you building an e-commerce empire? WordPress plugins like WooCommerce or Tidio are at your disposal.
However, the beauty of WordPress lies in its simplicity. It’s like having a canvas where you can continuously layer colours and textures, aligning them to your evolving web development vision. The vast community and support network ensure that guidance is never far. Yet, this simplicity can sometimes lead to an overwhelming number of choices, and without a clear direction, it's easy to lose focus. The vast plugin ecosystem, while rich, demands careful curation to avoid conflicts and ensure optimal performance, taking away a lot of its original simplicity. Without the plugin menu - how bespoke can your Wordpress site be?
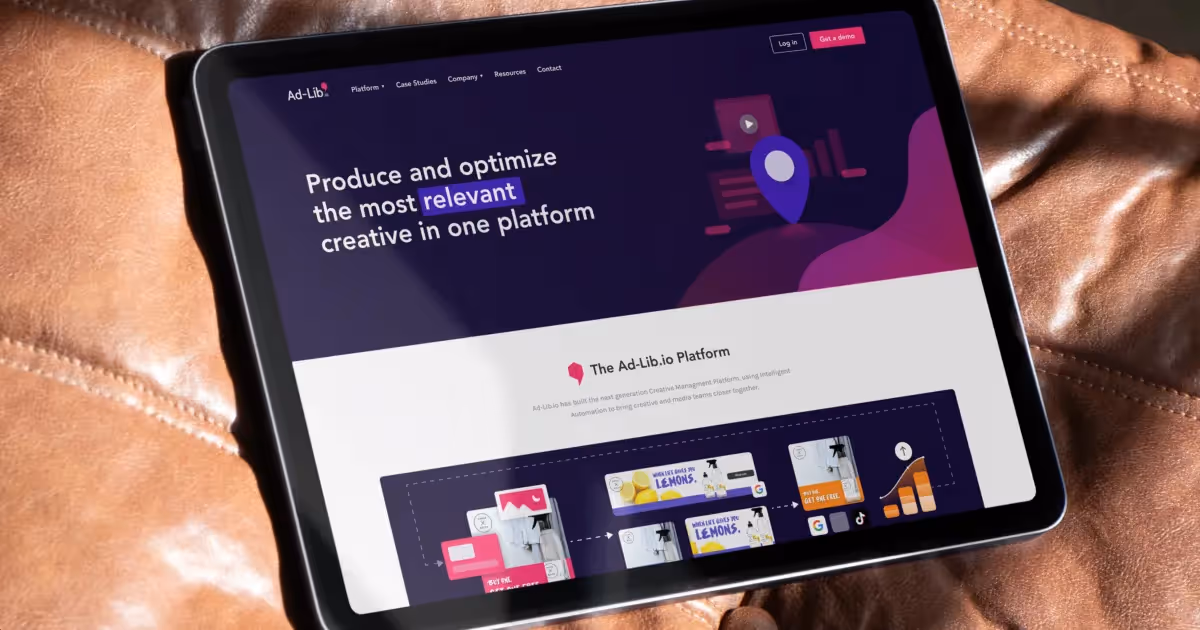
Examining a Webflow site
Unlike wordpress, Webflow is like a contemporary art gallery, with clean lines and a focus on form and function. It offers a more intuitive, design-centric approach, where the creative freedom is palpable. The market for Webflow is rapidly expanding, drawing in those who desire more control over their site's visual and interactive elements, without diving into the depths of code. Here, the user experience is prioritised, allowing for rapid prototyping and real-time updates. For designers who think visually, Webflow is a dream realised. Perfect for businesses with a complicated service offering that needs a well curated interface.
The process of using Webflow is akin to painting with watercolours – fluid, dynamic, and immediate. Its visual editor provides instant feedback, empowering you to see the effects of your changes in real-time. However, this freedom comes with a learning curve. Unlike the familiar streets of WordPress, Webflow requires a bit more initial exploration. But once mastered, the sense of empowerment it offers is unparalleled.
Simple or complex websites
As with any great endeavour, it's important to evaluate not just the tools but the mission behind your project. If your brand's purpose is deeply rooted in rich content and robust functionalities, WordPress's extensive ecosystem is a treasure trove. Its longevity ensures that almost any feature you can imagine is within reach, provided you have the patience to find and implement it. With that, it can be costly; to properly build-for-purpose and also to maintain.
On the other hand, if your brand is driven by a need for cutting-edge design, seamless user experience, and built in SEO tools, Webflow offers a matchless platform. Its ability to transform your vision into reality with precision and elegance can set you apart in a crowded digital marketplace. Webflow is a storytelling canvas, able to articulate complex technical concepts through the simplicity of a scroll, or bring immediacy to the metrics that will deliver your customers value and connect them to your offering.
How to execute a WordPress to Webflow migration
Migrating from WordPress to Webflow requires some forward planning and a smooth execution. While the process might seem straightforward there are some technical steps that will be integral to the successful transition of your website.
Pre-Migration
Performing a sitemap analysis
A great web developer will always perform a sitemap analysis prior to migrating. This essentially means taking stock of your WordPress website - identifying all pages, their hierarchy and interconnections. This infrastructure will be a guide for replication and/or improvement when designing your Webflow website.
Web design and staging
A staging site is where you can safely experiment. A web designer should use it to plan the layout of your new website. It's a crucial step to troubleshoot any potential design issues and visualise the implementation of your branding.
Identifying pages and Meta Tags
You'll need to identify every page and meta tag on your WordPress site to maintain your SEO efforts and the continuity of your website's visibility on search engines in order to smoothly transfer to Webflow.
Migration
The migration phase is where the actual content is transferred from WordPress to Webflow. This includes all SEO components, images and text.
Exporting WordPress content
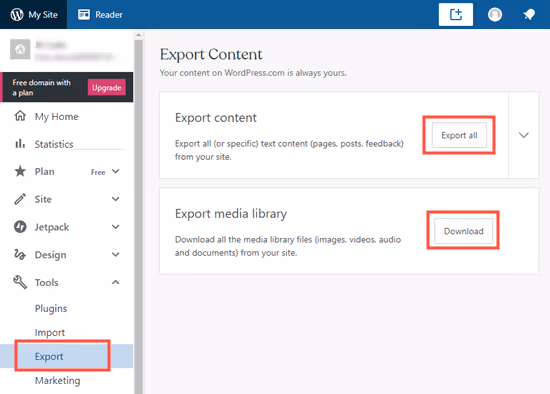
You can easily download your current websites content using WordPress's built-in export tool, including pages, posts, and media.
Importing content to Webflow
Webflow allows mass uploading of content via a CSV format using their internal import tool. However, you need to map each piece of content imported with the corresponding fields in Webflow i.e., blog posts, author details etc.
Migrating images
There is a possibility of compatibility issues due to Webflow's image optimisation features when migrating images. We'd recommend downloading the images from WordPress and re-uploading the images to Webflow's asset manager - individually re-linking to the pieces of corresponding content.
Create 301 redirects
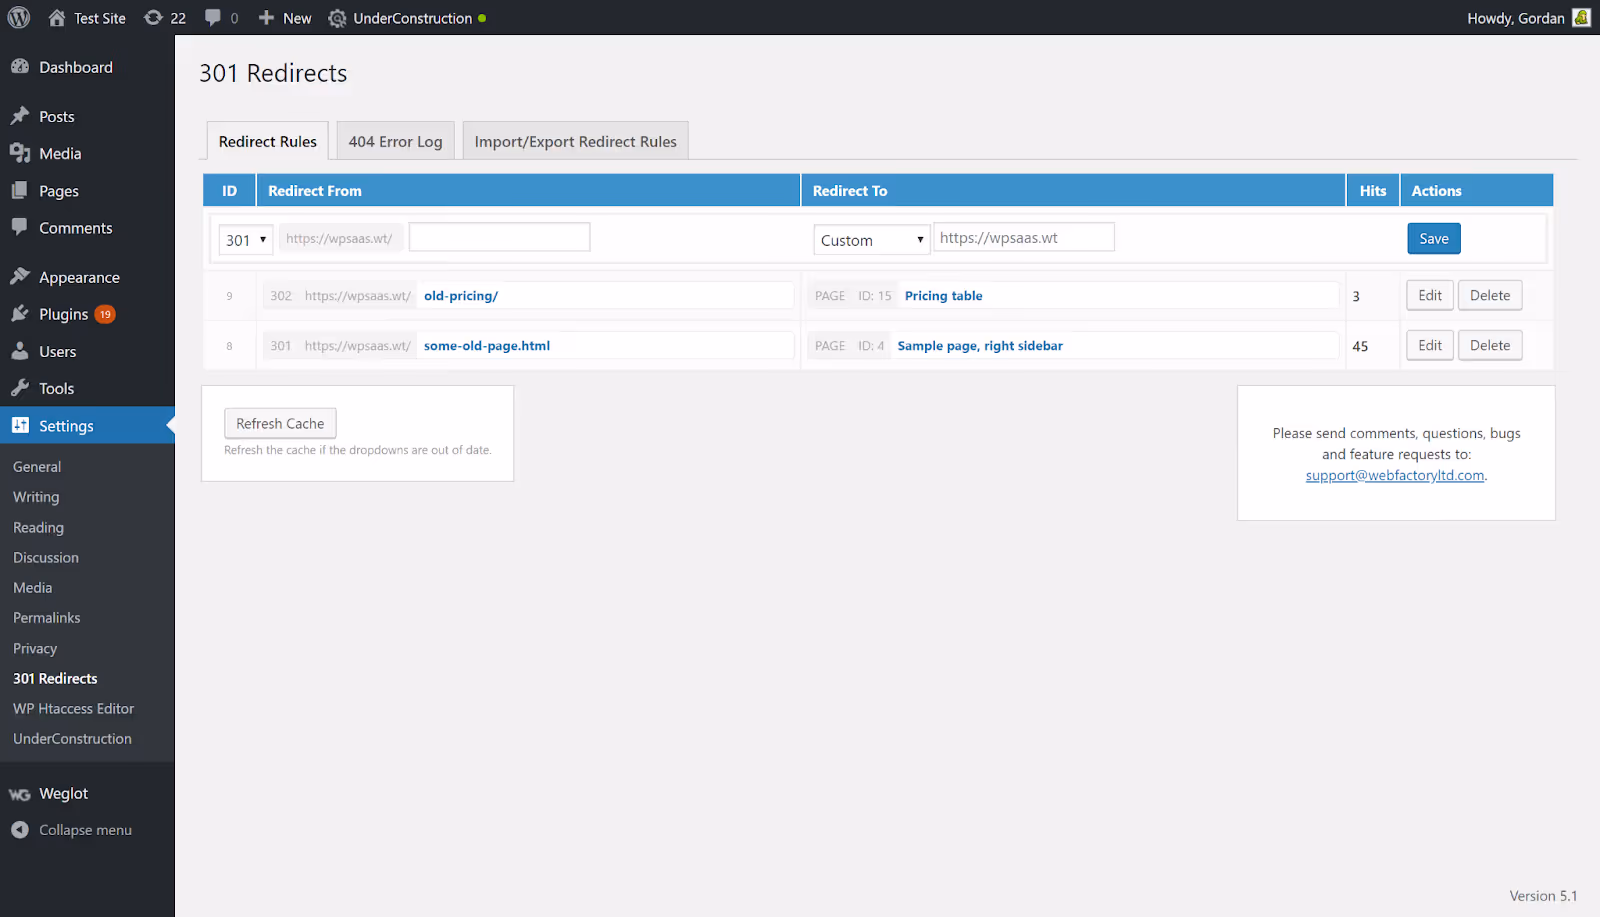
To maintain your SEO ranking, setting up 301 redirects from your old WordPress URLs to the new Webflow URLs is a must. Any change to your website's structure from moving to a new domain, means without 301 redirects search engines will interpret any changes as broken links. 301 redirects tell search engines and visitors that your site's content has permanently moved to a new location.
To redirect a page:
- Navigate to "Project Settings"
- Enter the current WordPress page address in the "Old Path" field and the new page address in the "Redirect to Page" field
- Click on "Add Redirect Path" button and you're set to go!
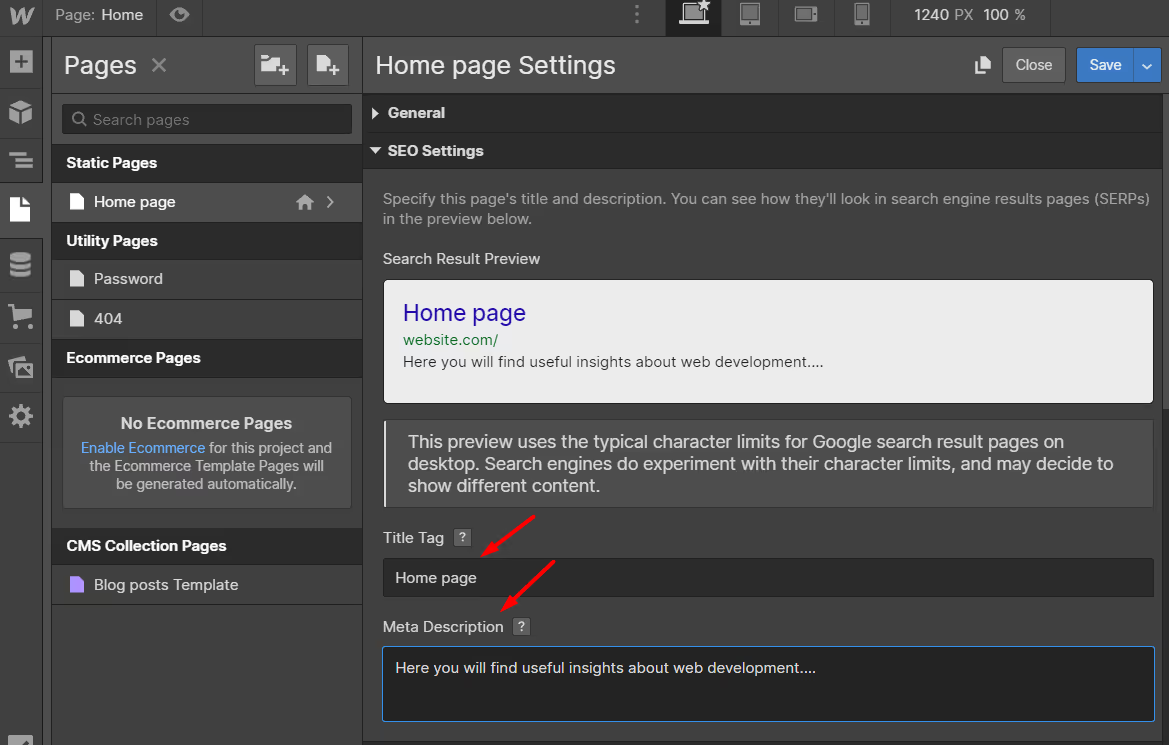
Adding Meta Titles and descriptions
These are key SEO elements that need transferring to the Webflow site for all corresponding pages.
- Open the "Pages" panel
- Select "SEO setting" on the page you want to update
- Then, input your SEO meta title and description in each field
Add Alt Tags
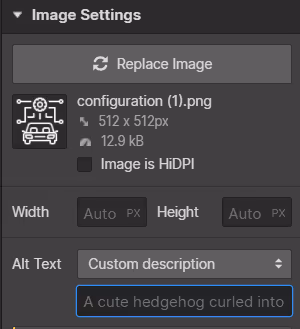
Alt tags help search engines understand content, as well as describing images to those with visual impairments. Adding an alt tag on Webflow is straightforward.
- Open "Settings" in the panel
- Simply enter your alt text in the field named so
Create a robots.txt File and Sitemap
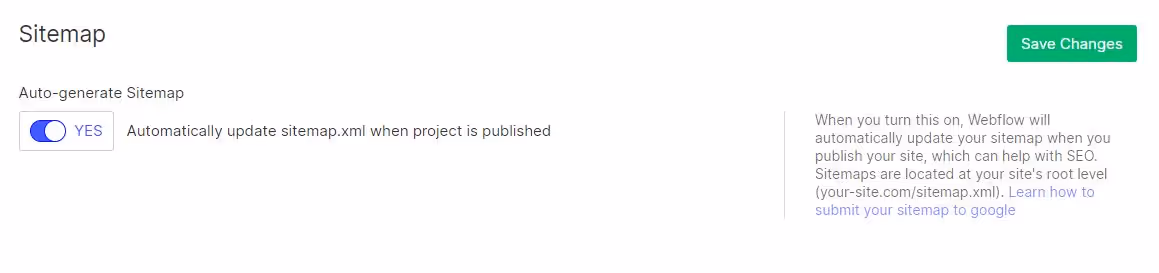
Your robots.txt file and a sitemap are essential components for guiding search engine crawlers. A sitemap provides a roadmap for website crawlers, while a robots.txt file tells crawlers which of those pages to ignore.
In Webflow, setting up an auto-generated sitemap is simple:
- Navigate to 'Project settings'
- Click on the 'SEO' tab
- Under the 'Sitemap' section, switch on 'Auto-generate Sitemap'
- Ensure you save those changes and publish them to your site to take effect.
Update DNS Settings
Lastly, update the DNS settings with your domain registrar to point your domain name to your new Webflow site.
Post Migration
This stage of migration simply involves thorough testing and making adjustments accordingly. Ensure you check all forms, links and videos are working correctly. Check this via various devices and browsers.
Even after launching your new Webflow website you need to monitor it routinely. Use tools like Google Analytics to track its performance and make changes based on the data. This could be tweaks to design elements, altering page structures, or updating content to optimise your users experience and sites performance.
The migration process, even when detailed, can pose challenges. Make sure you consider these when studying the immediate results from your site:
- Potential loss of SEO ranking due to any issues with redirects
- Any content mapping and image migration issues
- Possible disruptions of your website's user experience if there are any broken links
This is where &above expert Webflow and WordPress developers can ensure an efficient and effective migration with our comprehensive understanding of both CMS's.
Final wordpress vs webflow thoughts
Ultimately, the choice between WordPress and Webflow should be guided by your brand's identity and needs. Both platforms offer unique advantages and require different approaches. The journey to building your digital presence is a microcosm of your brand’s true self – understanding its core, its purpose, and how best to represent it in the digital world. By aligning your platform choice with your brand's essence, you ensure a foundation that is not only sturdy but also resonant with your vision.